
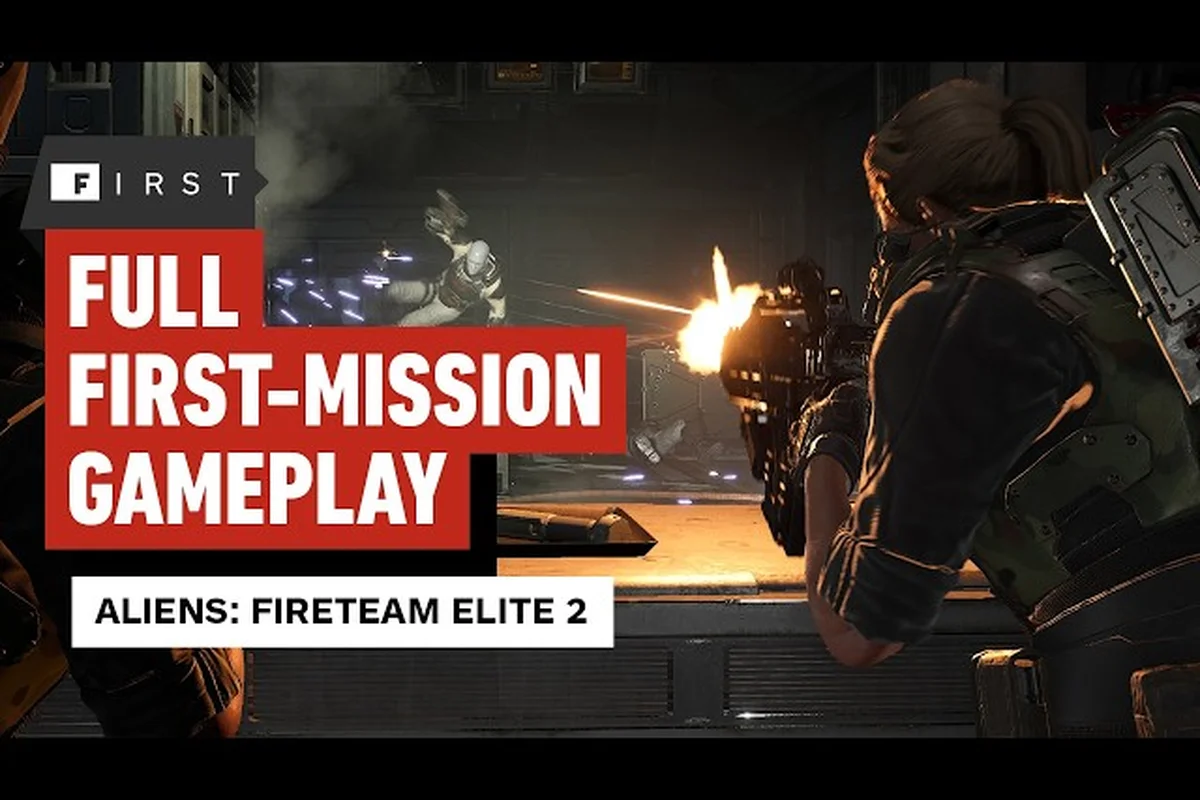
Your boots hit the deck of the Endeavor and the first thing you notice is that LV-558 smells like burnt ozone and rust. That is normal. The Aliens Fireteam Elite 2 first mission guide you are reading right now exists because the opening deployment at Storr Boon's Mining Facility decides how the next 15 missions treat you, and because most new players walk into their first firefight without a plan. The game gives you exactly one chance to make a strong first impression, and the difference between a clean extraction and a messy retreat comes down to gear, positioning, and knowing what crawls out of the vents.
What matters most in those first forty minutes is preparation, not reflexes. You need to know which class survives contact with the enemy, which weapons actually put xenos down, and how the game's bot squadmates behave when you are running solo. That is what this Aliens Fireteam Elite 2 first mission guide covers in detail, along with the specific threats you will face, the difficulty curves you can expect, and the loadout choices that keep you standing when the swarm closes in.
First Mission Overview: What You Are Actually Doing on LV-558
The opening campaign mission drops you into Storr Boon's Mining Facility after a distress call from a geological survey team, and the setup sounds simple on paper: reach the comms relay, restore power, and survive until extraction. Nothing on LV-558 is simple, however, because the facility has been overrun by a Xenomorph hive that has turned the mining tunnels into a breeding ground. Your fireteam pushes through three distinct zones, each with its own pacing and threat profile, before the mission closes with a defensive stand that tests everything you learned in the previous twenty minutes.
Mission Flow and Objectives
The mission breaks down into four clear phases, and knowing what comes next helps you conserve ammo and abilities at the right moments: each phase introduces distinct enemy spawns and environmental hazards, so pacing your consumables and ultimate skills during the first two waves ensures you have enough firepower for the final push against the elite synth squad.
-
Zone One — Surface Approach: Light resistance from Runners in small packs, mostly to teach you the shooting fundamentals and weapon switching.
-
Zone Two — Main Processing: The facility interior where you restore power to the elevator. Expect your first Spitter encounter and the game's tutorial on weak points.
-
Zone Three — Mining Shafts: The tightest corridors in the mission, where Drone packs use the vents to flank you. This is where the AI squadmates earn their keep.
-
Zone Four — Extraction Point: A timed defense sequence with three waves of escalating size. The mission ends after you hold the position for roughly 90 seconds.
Your performance in these four zones determines your mission rating, which feeds into the challenge card system for replay value. Playing through this first mission on Standard difficulty takes most squads between twenty-five and thirty-five minutes, though solo players with bot teammates often add another ten minutes to that estimate because the AI moves cautiously through the unknown.
The Six Classes and Which One Survives Contact
Choosing your class before deployment matters more than any individual weapon because it locks in how you contribute to the fireteam. The Aliens Fireteam Elite 2 first mission guide needs to be honest with you here: some classes absolutely carry the early game, and others expect you to already know what you are doing. The game spots you with six USCM classes — Marauder, Duelist, Machinist, Hunter, Medic, and Specialist — and each arrives with a distinct role in the squad chemistry.
Here is how the classes perform in the opening mission, based on the official class descriptions and what the community reports after the first week of early access: the Gunner excels at sustained damage output, the Demolisher shines against clustered xenos, the Technician provides turret support for choke points, while the Doc and Recon offer healing and recon utility, though the latter struggles in tight corridors.
| Class | Role | First Mission Verdict | Difficulty to Pilot |
|---|---|---|---|
| Marauder | Close-range damage | Excellent — the shotgun melts Runners | Beginner-friendly |
| Duelist | Precision single-target | Strong against Spitters, weak in crowds | Intermediate |
| Machinist | Turret and trap support | Very strong for defense waves | Beginner-friendly |
| Hunter | Long-range marksman | Good damage, struggles in tight tunnels | Intermediate |
| Medic | Healing and support | Essential for solo play with bots | Beginner-friendly |
| Specialist | Hybrid utility | Powerful but unlocked later | Advanced |
The Machinist deserves a special callout for the opening mission because the turret deployment gives you a second gun in the extraction sequence, which is exactly where most first attempts fall apart. If you are strictly following an aliens fireteam elite 2 solo guide approach, the Medic class with its healing beacon and suppression station keeps your bot squadmates alive through the toughest encounters. The Marauder, by contrast, punishes positioning mistakes because you have to be close to deal damage, which means you are also close to the claws.
Weapon Loadouts and the Infinite-Ammo Sidearm System
The weapon loadout system in Aliens Fireteam Elite 2 deviates from the first game in one significant, welcome way: your sidearm now has infinite ammunition and relies on a heat meter instead of a magazine. That change alone reshapes how you approach the first mission, because you no longer need to ration pistol shots against stray Runners. The loadout screen offers three slots — the primary weapon, the infinite-ammo sidearm, and a Signature weapon with a longer cooldown but a much bigger punch.
Recommended Loadout for First Mission
Community testing over the launch weekend suggests this loadout combination gives new players the easiest path through the opening mission: pairing a Gunner with a Technician and a Doc maximizes both offensive and defensive stability, using the Technician's turret to cover the rear approach while the Gunner focuses on frontal threats, and the Doc's medkit reserves keep the squad alive during the final boss encounter.
| Slot | Recommended Option | Why It Works |
|---|---|---|
| Primary | Pulse Rifle (Standard) | Reliable mid-range damage with burst control |
| Sidearm | M4A4 Pistol | Infinite ammo, accurate, handles heat well |
| Signature | Frag Launcher | Clears packed groups during the defense wave |
| Tactical | Cryo Grenade | Freezes elites so your team can focus fire |
The Pulse Rifle remains the default choice for good reason: it handles both close packs and mid-range Spitters without requiring perfect aim, and the burst-fire mode preserves ammunition against the early waves. Your infinite-ammo sidearm should be the M4A4 Pistol because it has the most forgiving heat curve, letting you spam shots against Runners without risking an overheat penalty at the wrong moment. Save the Frag Launcher for the extraction wave where enemies approach through predictable chokepoints, and the Cryo Grenade for the moment a Praetorian shows up during the final push — freezing it for those precious seconds turns a chaotic fight into a simple execution.
Playing Solo: How the AI Squadmates Actually Behave
The matchmaking system in Aliens Fireteam Elite 2 supports four-player co-op, but plenty of players want to run the campaign alone, and the game accommodates that with AI squadmates that fill your empty slots. The question everyone asks is whether the bots can hold their own, and the honest answer per the aliens fireteam elite 2 ai squadmates guide community reports is that they can keep you alive but will not carry you through mistakes. The bot teammates are serviceable in the first mission because the enemy density stays manageable, and they are actually quite good at reviving you when you go down.
Working With Bot Teammates
The AI behavior follows a few predictable patterns that you should plan around: xenos will always funnel through the main doorways in the first phase, elites pause to telegraph their attacks before charging, and the final boss prioritizes the player with the highest threat level, so rotating aggro among teammates prevents any single player from being overwhelmed.
-
Bots prioritize survival over aggression: They will retreat from dangerous positions and disengage from melee range, which means you cannot rely on them to hold a doorway alone.
-
Bots use abilities on timers: A Medic bot will drop a healing station when your health drops below a threshold, but you should still carry medkits because the timing is not always ideal.
-
Bots revive quickly but expose themselves: When you go down, a bot will break off to revive you, but this creates a window where the swarm ignores them — use that moment to reposition once you are back up.
-
Bots conserve ammunition: They will not burn through their Signature weapon on small groups, so save your own heavy ordnance for the elites.
The solo experience with bots plays best on Standard difficulty, where the enemy scaling assumes you have a full squad but the bots' limitations do not punish you unfairly. If you want to run through the mission on higher difficulty settings alone, the aliens fireteam elite 2 solo guide advice is to bring the Machinist class and let your turrets compensate for the bots' passive positioning. The turrets draw aggro, the bots capitalize on the distraction, and you control the fight from behind cover.
Difficulty Settings and the Challenge Card System
Aliens Fireteam Elite 2 ships with a difficulty guide embedded in its progression systems because the game expects you to replay missions. The Standard difficulty unlocks at the start, but you will quickly unlock Intense, then Extreme, and finally Insane as you earn mission completions. Each step increases enemy health, damage, and pack size while reducing your ammunition pickups, and the first mission on Intense is a genuinely different experience from your first playthrough.
| Difficulty | Enemy Health Multiplier | Damage Taken | Notable Changes |
|---|---|---|---|
| Standard | 1.0x | 100% | Baseline experience, forgiving ammo economy |
| Intense | 1.5x | 130% | More Runners per pack, Spitters spawn earlier |
| Extreme | 2.0x | 160% | New enemy behaviors, reduced ammo drops |
| Insane | 2.5x | 200% | Friendly fire enabled, no respawns |
The challenge card system adds modifiers on top of these difficulties, letting you stack conditions like "Elite Enemies Only" or "Reduced Vision" for bonus rewards. For your first run, play on Standard and ignore the challenge cards entirely — you can revisit the mission with modifiers once you have unlocked the Specialist class and built out your perk grid. That said, if you are comfortable with third-person shooters and want a steeper curve, Intense on the first mission is a fair test without feeling unfair, and the extra credits you earn unlock weapon mods faster for the later campaign missions.
The Enemy Roster on LV-558 and How to Counter It
Your first mission introduces the four enemy types that will follow you through the rest of the campaign, and each one demands a different response. The community calls the opening mission a tutorial for good reason, because the Xenomorph variety you face here shows up consistently in the later biomes. Learning to identify and counter these threats now saves you endless frustration on the harder difficulties.
Enemy Breakdown and Counter Tactics
-
Runners: The baseline swarm unit, fast on the ground but fragile. A controlled burst from the Pulse Rifle drops them in three to five rounds, and your infinite-ammo sidearm handles stragglers efficiently.
-
Drones: Tougher, faster, and prone to wall-climbing that lets them flank your position. Use the Cryo Grenade to freeze a group and focus fire on one Drone at a time, because splitting damage across the pack wastes ammunition.
-
Spitters: These ranged enemies lob acid projectiles from a distance and punish static positions. They expose a glowing weak point on their abdomen when they wind up their attack — interrupt the cast to stagger them.
-
Praetorian: The first elite encounter appears during the extraction sequence and has heavy armor on the front. Flank it or use the Frag Launcher to break the armor plating, then unload into the exposed tissue.
The most important tactical lesson from the first mission guide community reports is to keep moving during fights. Standing still in Aliens Fireteam Elite 2 gets you swarmed because the enemy AI actively flanks your position using vents and overhead paths. The tiniest reposition, even a lateral shuffle behind a cargo crate, forces the pack to reroute, which creates the firing windows you need.
Essential Tips for a Clean First Mission Run
Beyond the class, loadout, and enemy knowledge, a handful of practical tips separate a clean run from a messy one. These come from watching players troubleshoot their early attempts across the community Discord and the official Steam forums, and they apply whether you are running with AI squadmates or a full human squad.
What to Do Before You Deploy
-
Set your perks before launching the mission: You have a 42-slot perk grid available, and even the starter perks meaningfully improve your survivability. The Damage Reduction perk is the single best early investment for your first mission run.
-
Reassign your class specialization: Prepare one loadout for crowd control and one for single-target damage, because the first mission has both scenarios. You cannot change weapons mid-mission, so your pre-mission choices matter.
-
Check your mic and voice chat settings: Crossplay with voice chat is available at launch on Steam, Epic, PS5, and Xbox Series X|S, and coordinating with human players makes the extraction wave dramatically easier.
-
Restock medkits and consumables: The loadout screen lets you bring two consumables, and you should carry at least one medkit even if you are the Medic class, because bot heal timers are not always reliable.
Very much like the beginner guide for Aliens Fireteam Elite 2 explains, the opening hour of the game is designed to teach you systems through repetition, and the first mission sets up the loop that carries through all 15 campaign missions. The mission is not about getting a perfect score — it is about learning the rhythm of when to push, when to hold, and when to spend your Signature weapon.
Frequently Asked Questions
What is the best class for the Aliens Fireteam Elite 2 first mission?
The Machinist is the safest pick because turrets provide extra damage during the extraction defense sequence, and the class works equally well with human players or AI squadmates. The Medic is the better choice for solo play, however, since the healing beacon keeps your bot teammates alive through the hardest fights.
Can I play the first mission with only AI squadmates?
Yes, absolutely. The game assigns AI squadmates to fill empty slots when you launch a mission without a full party, and they perform competently on Standard difficulty. Your bot teammates will revive you, use abilities, and contribute damage, though you will need to carry more of the offensive weight compared to playing with human players.
What difficulty should I choose for my first playthrough?
Start on Standard because it gives you room to learn enemy patterns and explore the facility without punishing mistakes. The mission rating system still rewards you for good performance, and you can replay the mission on Intense or higher once you have better weapons and more of the perk grid unlocked.
How long does the first mission take to complete?
A typical run lasts 25 to 35 minutes on Standard difficulty with a coordinated squad. Solo players using AI squadmates should budget closer to 45 minutes because the bots move cautiously and you will need to handle more of the offensive work, especially during the final defense wave.
Do I lose anything if I fail the first mission?
Failing the first mission just boots you back to the Endeavor with zero mission rewards, and the campaign restarts from the drop. You keep all weapon attachments, consumables, and challenge cards from pre-deployment—no permanent loss. Dying to the Praetorian only costs time, not gear.